Fish aggregating devices Guide
Fish aggregating devices (FADs) are human-made structures anchored offshore that attract fish, making them easier to catch so you can have a great fishing experience.
Fish attracted to FADs
Most fish attracted to the FADs are seasonal pelagic fish, which travel in the warm water delivered by ocean currents. Species caught around the FADs include mahi mahi, wahoo, tuna, cobia, mackerel and billfish.
Mahi mahi are the most common species of fish caught around the FADs and are the perfect sport fish:
- They have a remarkable growth rate, known to grow as fast as 7cm in a week.
- Adult fish can grow to almost 200cm (weighing up to 40kg).
- They can be sexually mature as early as 6 months of age and reproduce at a high rate.
- They are relatively short-lived—they rarely live past 2 years of age.
Safety around FADs
- Find out how to fish safely around FADs.
- To report a lost or damaged FAD, email FADS@dpi.qld.gov.au or call 13 25 23.
Monitoring programs
You can help monitor fish numbers around the FADs by:
- providing details of your recreational fishing trips at the FADs via the QLD Fishing 2.0 app
- providing your catch details to Fisheries Queensland boat ramp survey staff at public boat ramps
- tagging pelagic fish caught near FADs (find out how to get involved in the New South Wales Department of Primary Industries Game Fish Tagging Program)
- reporting the capture of tagged mahi mahi by calling the phone number on the tag or emailing FADS@dpi.qld.gov.au.
FADs are also fitted with acoustic receivers that detect and track acoustic-tagged animals. They form part of the Integrated Marine Observing System national receiver network for animal tracking around Australia.
-
How fish aggregating devices work
Fish aggregating devices (FADs) provide structure in an open ocean environment. Fish are attracted to FADs for various reasons, including to feed on prey species or as reference points for schooling. Most fish attracted to the Queensland FADs are seasonal pelagic fish, which travel in the warm water delivered by ocean currents.
The FADs work most effectively when the sea temperature exceeds 20°C. Various FADs were assessed to find the best design for the intended species and to withstand the particularly harsh sea conditions experienced off the Queensland coast.
Three types of FADs are deployed off Queensland: surface FADs, subsurface FADs and all-water FADs. Each type is designed specifically for the locations and intended species, and all are anchored to the sea floor.
Surface FADs
These consist of:
- 800mm cone-shaped special marker buoy
- 2nm range marine lantern
- acoustic receiver
- GPS tracker.
These FADs are designed to aggregate pelagic fish, particularly mahi mahi, wahoo, cobia and billfish.
Subsurface FADs
These consist of:
- six 300mm floats
- dyneema aggregators.
The top of the FADs are positioned a minimum 25m below the surface.
These FADs are designed to aggregate mahi mahi, yellowfin tuna and billfish.
All-water FADs
These consist of:
- 800mm cone-shaped special marker buoy
- 2nm range marine lantern
- acoustic receiver
- GPS tracker
- mid-water 300mm buoy/s
- dyneema aggregators
- 1.6 tonne pyramid/ledge and cave habitat anchor/s.
These FADs are designed to aggregate pelagic and demersal fish species including mahi mahi, cobia, mackerel, trevally, golden snapper, cod and coral trout.
-
Safe use of fish aggregating devices
Fish aggregating devices (FADs) are for the benefit and enjoyment of all fishing sectors, so make sure you follow the code of conduct:
- Respect other FAD users at all times.
- Be courteous to fishers who are already using the FAD.
- FAD users should take turns fishing the FAD and accommodate new arrivals.
- Spearfishers should be aware of other FAD users and should not enter the water if other boats are around the FAD. Likewise, anglers should wait until spearfishers have completed their drift past the FAD before deploying lines (spearfishers usually only spend a short time around FADs).
- Spearfishers should always tow a float displaying the 'Divers Flag A'.
- A safety boat, with the operator acting as a lookout, should accompany spearfishers at all times.
- All fishers should keep boats, lines and lures a safe distance from the FAD, spearfishers and other boats at all times.
- Do not tie your boat up to the FADs. This may damage the mooring line of the FAD, causing the device to break free and become lost (fines apply).
- Limit your catch—don't catch your limit, and only take what you need.
Drift fishing and trolling are the most effective techniques for line fishing around FADs—however, avoid using sinkers.
The subsurface FADs are not visible from the surface, so use the GPS coordinates and locate the fish in the area with an echosounder.
Boating safety
Some FADs are situated long distances from shore, so please make sure your boat is suitable for offshore fishing and you have all the correct safety equipment required by law. Find out what safety equipment you need at Maritime Safety Queensland.
Make sure conditions are suitable for boating before heading offshore. Check the current marine weather forecast at the Bureau of Meteorology.
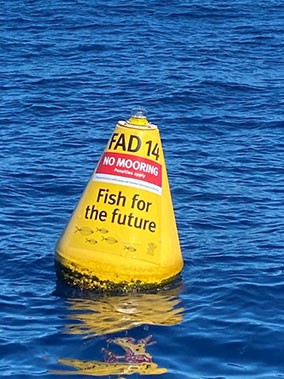
No mooring
FADs are not designed as mooring devices—no mooring is allowed (fines apply).
FADs work most effectively when they are left in place for long periods of time. Tying your boat to a FAD can result in the anchors dragging or the FAD breaking free and becoming lost. Every time a FAD is lost, a productive fishing location is also lost.
-
Find a fish aggregating device
Our FADs require annual maintenance checks, which are scheduled throughout the year.
Check this page before your next fishing trip to see which FADs are in the water.
Fish aggregating devices (FADs) are deployed in the following locations all year round:
South East Queensland
FAD type FAD location Latitude (DDM) Longitude (DDM) Distance from nearest access point (nm) Depth of water (m) Surface FAD FAD 1: Gold Coast 24s 27° 59.268'S 153° 31.747'E 6 from Gold Coast Seaway 46 Surface FAD FAD 2: Gold Coast 50s 27° 55.790'S 153° 45.198'E 16 from Gold Coast Seaway 85 Surface FAD FAD 3: Gold Coast 36s 27° 48.408'S 153° 37.472'E 12 from Gold Coast Seaway 68 Surface FAD FAD 11: Gold Coast 36s 28° 02.980'S 153° 39.395'E 16 from Gold Coast seaway 65 Surface FAD FAD 12: Gold Coast 36s 27° 56.040'S 153° 38.331'E 11 from Gold Coast seaway 64 Surface FAD FAD 12B: Gold Coast 36s 27° 55.462'S 153° 37.571'E 11 from Gold Coast seaway 64 Surface FAD FAD 12C: Gold Coast 36s 27° 55.029'S 153° 38.267'E 11 from Gold Coast seaway 64 Surface FAD FAD 13: Gold Coast 50s Not deployed Not deployed 20 from Gold Coast Seaway 86 Surface FAD FAD 14: Gold Coast 36s Not deployed Not deployed 18 from Gold Coast Seaway 66 Surface FAD FAD 15: Point Lookout offshore Not deployed Not deployed 12 from South Passage bar 104 Surface FAD FAD 4: Stradbroke offshore 27° 17.029'S 153° 37.672'E 9.5 from South Passage Bar 83 Surface FAD FAD 16: Moreton offshore 27° 11.097'S 153° 36.894'E 13 from South Passage bar 108 Surface FAD FAD 5: Moreton offshore Not deployed Not deployed 14 from Comboyuro Point 89 Surface FAD FAD 17: Cape Moreton offshore 26° 59.654'S 153° 33.585'E 5 from Cape Moreton 108 Surface FAD FAD 6: Bribie offshore Not deployed Not deployed 12 from Comboyuro Point 100 Surface FAD FAD 18: Wide Caloundra 26° 44.758'S 153° 27.189' 18 from Mooloolaba 60 Surface FAD FAD 19: Mooloolaba 18nm 26° 34.521'S 153° 27.213'E 18 from Mooloolaba 49 Surface FAD FAD 7: Mooloolaba 10nm 26° 35.908'S 153° 19.686'E 10 from Mooloolaba 55 Surface FAD FAD 7B: Mooloolaba 10nm 26° 34.999'S 153° 18.665'E 10 from Mooloolaba 56 Surface FAD FAD 7C: Mooloolaba 10nm Not deployed Not deployed 10 from Mooloolaba 56 Surface FAD FAD 8: Mooloolaba east Not deployed Not deployed 24 from Mooloolaba 101 Surface FAD FAD 20: Noosa 26° 22.700'S 153° 14.300'E 9 from Noosa 52 Surface FAD FAD 9: Noosa 26° 15.558'S 153° 19.754'E 14 from Noosa 55 Surface FAD FAD 10: Double Island offshore 25° 53.075'S 153° 21.907'E 16 from Wide Bay Bar 57 Surface FAD FAD 21: K’gari (formerly Fraser Island) offshore 25° 41.269'S 153° 22.616' 17 from Wide Bay bar 51 Subsurface FAD SFAD 1A: Gold Coast continental shelf 27° 55.542'S 153° 53.764'E 25 from Gold Coast Seaway 256 Subsurface FAD SFAD 1B: Gold Coast continental shelf 27° 54.555'S 153° 54.108'E 25 from Gold Coast Seaway 273 Subsurface FAD SFAD 1C: Gold Coast continental shelf 27° 55.425'S 153° 54.765'E 26 from Gold Coast Seaway 306 Subsurface FAD SFAD 2A: Point Lookout continental shelf 27° 25.720'S 153° 49.764'E 19 from South Passage Bar 250 Subsurface FAD SFAD 2B: Point Lookout continental shelf 27° 24.894'S 153° 50.489'E 20 from South Passage Bar 258 Subsurface FAD SFAD 2C: Point Lookout continental shelf 27° 25.738'S 153° 51.278'E 20 from South Passage Bar 290 Subsurface FAD SFAD 3A: Cape Moreton continental shelf 27° 01.074'S 153° 45.918'E 22 from Comboyuro Point 269 Subsurface FAD SFAD 3B: Cape Moreton continental shelf 27° 00.412'S 153° 46.696'E 23 from Comboyuro Point 280 Subsurface FAD SFAD 3C: Cape Moreton continental shelf 27° 01.088'S 153° 47.563'E 23 from Comboyuro Point 295 Subsurface FAD SFAD 4A: Mooloolaba continental shelf 26° 40.491'S 153° 40.111'E 29 from Mooloolaba 233 Subsurface FAD SFAD 4B: Mooloolaba continental shelf 26° 39.887'S 153° 40.786'E 29 from Mooloolaba 244 Subsurface FAD SFAD 4C: Mooloolaba continental shelf 26° 40.709'S 153° 41.170'E 30 from Mooloolaba 252 Wide Bay Burnett
FAD type FAD location Latitude (DDM) Longitude (DDM) Distance from nearest access point (nm) Depth of water (m) Surface FAD FAD F1: Rooney Point, K’gari (formerly Fraser Island) Not deployed Not deployed 31 from Urangan 34 Surface FAD FAD F2: K’gari (formerly Fraser Island) offshore Not deployed Not deployed 8 from Sandy Cape 54 Surface FAD FAD F3: K’gari (formerly Fraser Island) offshore Not deployed Not deployed 11 from Waddy Point 54 All-water FAD FAD B1a: Bundaberg offshore 24° 39.163'S 152° 32.925'E 10 from Burnett Heads 25 All-water FAD FAD B1b: Bundaberg offshore 24° 39.265'S 152° 33.012'E 10 from Burnett Heads 25 All-water FAD FAD B1c: Bundaberg offshore 24° 39.355'S 152° 32.922'E 10 from Burnett Heads 25 All-water FAD FAD B1d: Bundaberg offshore 24° 39.280'S 152° 32.835'E 10 from Burnett Heads 25 Far North Queensland
FAD type FAD location Latitude (DDM) Longitude (DDM) Distance from nearest access point (nm) Depth of water (m) Surface FAD FAD G1: Weipa 12° 58.959'S 141° 17.009'E 36 from Weipa 30 Surface FAD FAD G2: Weipa 12° 56.448'S 141° 22.193'E 29 from Weipa 30 Surface FAD FAD G3: Weipa 12° 48.671'S 141° 23.665'E 25 from Weipa 30 Surface FAD FAD G4: Weipa 12° 49.903'S 141° 32.594'E 18 from Weipa 21 All-water FAD FAD G5: Karumba 17° 21.737'S 140° 43.887'E 8 from Karumba 7 All-water FAD FAD G6: Karumba 17° 14.916'S 140° 37.286'E 18 from Karumba 11
Fish aggregating devices, 22 Sep 2025, [https://www.qldgovau.staging-services.qld.gov.au/recreation/activities/boating-fishing/rec-fishing/fish-aggregating-devices]
This document is uncontrolled when printed. Before using the information in this document you should verify the current content on https://www.qldgovau.staging-services.qld.gov.au/recreation/activities/boating-fishing/rec-fishing/fish-aggregating-devices.